
Azure boards – does it make sprint planning enjoyable?
Azure boards aims to make sprint planning easier and faster than ever before. Combining ease of use and plenty of customization options it sounds pretty good but is it worth a try?
I would say that if you are heavily using Azure already this is something you cannot miss. Boards takes everything one step further than its competitors. Sure you can have the same features on Jira too but it takes lot more work to get it done.
Boards uses Kanban -style board to manage tasks and combines that into deep integration into source control and Azure DevOps.
I am not going to go into every detail here but just to overview how we have used this board to manage sprint activities.
And also how to get relevant info into different stakeholders.
Lets Scrum
With this view we are building we have a different view for developers and people who want to have oversight on how things are progressing.
We use Scrum process as a starting point where views are divided into backlog items and features.
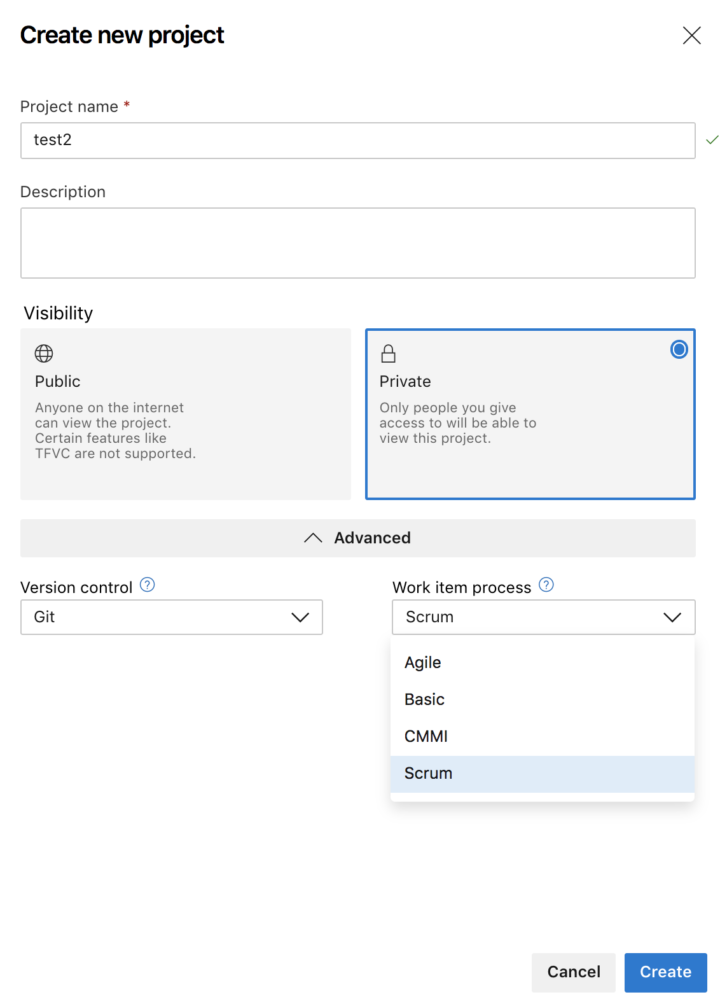
If you are starting a new board choose “Scrum” as the process when creating a board under advanced options
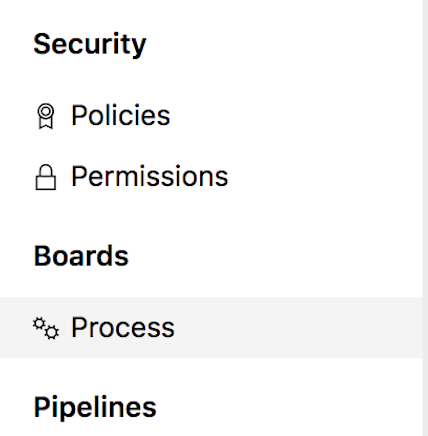
If you already have a boards in use and you are not using “Scrum” you need to change the current process into scrum. To change it go to organizational settings and choose process under boards.
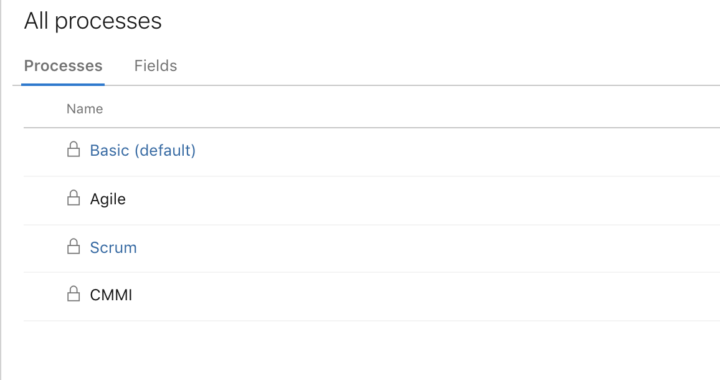 There we see all the available processes.
Choose Basic by clicking it. This is the default process that boards assigns to your board when creating.
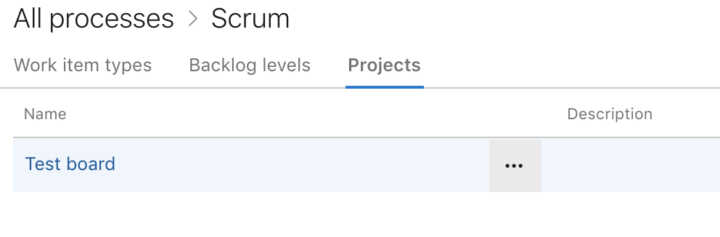
Then select projects and under this you see your board, in this case “Test board”. Press the three dots and select “change process”
Select “Scrum” from the dropdown menu and off you go.
Depending on how much items you already have on your board you might need to resolve some conflicts like wrong type of items.
Now go to your board see that there is now different views for backlog item and features. Structural flow is that backlog items are child items for features. Features simply define a feature that is being implemented and backlog items are steps to get it done.
Let’s start by creating a feature.
Make sure you are at Feature view at boards. This can be changed at top right corner dropdown menu. (choose Features)
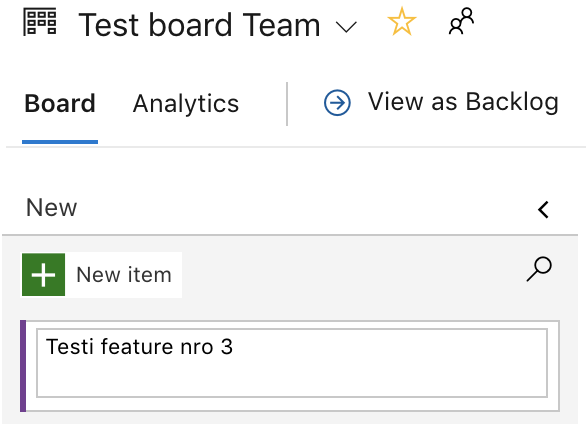
Click “New item” and name the Feature, in this case i named it as Testi feature nro 3 as i have couple of items done already. Then we proceed to make a backlog item belonging into this feature.
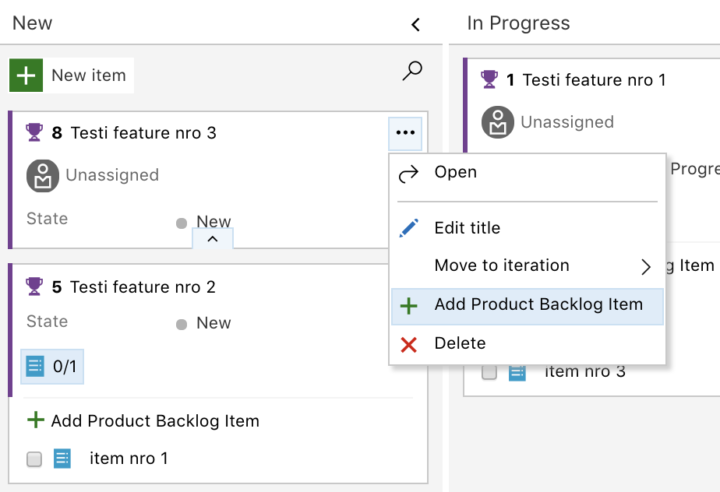
Click the three dots on the right hand corner of the item and choose “Add product backlog item” to add a child backlog item. Name the item as you like.
Once you made a first backlog item under feature you don’t need to go through that three dots menu again to make more backlog items. Because now there is a “Add product backlog item” straight at the card.
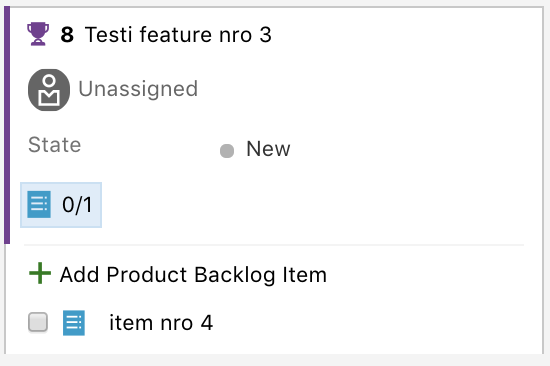
And you can add more items by just clicking it.
Now we have some content on our board and we can see how this is structured. We have two views now. A backlog item view and feature view.
Backlog item view is used mainly by developers where they see individual tasks and what is their status.
Choose this board by clicking upper right hand corner drop down menu and select “Backlog items”
This presents a view of backlog items and their statuses. This is pretty standard view, there are items and they are assigned to developers 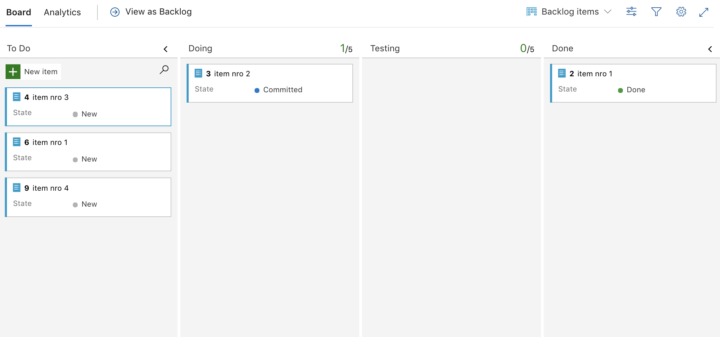
By clicking open one item you can see more info like which feature is a parent for that item.

Another view that we use here is a feature view. This is to be used by people who are supervising developers or a client who would like to see how things are progressing.
Choose this board by clicking top hand corner dropdown menu and choose “Features”
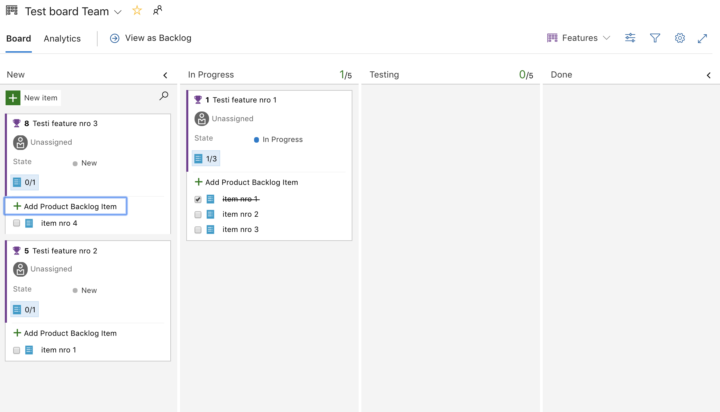
The beef here is that this view presents immediate visualization on what is the status of features and how many backlog items under that feature are done. And we don’t want use same view for everyone as this would be a compromise.
Customize
Now lets look a bit into customizing the Scrum process. As it is often a case that we need something that is not part of the standard process.
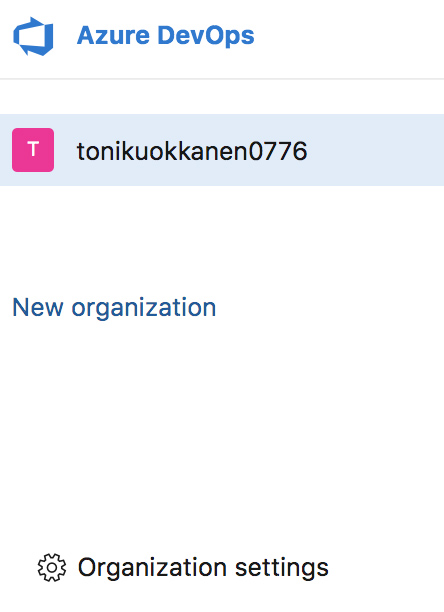
Click Azure DevOps logo on the left top corner and click “Organizational Settings” at the bottom
Select “Process” under Boards
For us to be able to make customizations into processes we need to make a copy of them. Original processes cannot be customized.
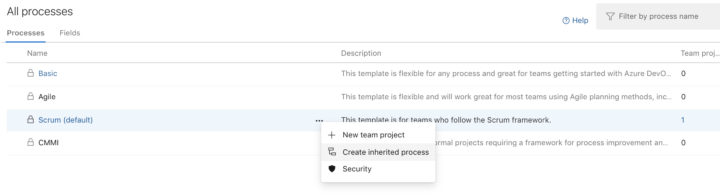
Click the three dots next to “Scrum” and click “Create inherited process”
 Name the process as “Scrum customize”
And once done select and choose “Set as default process” to take this into use.
Click “Scrum customize” process to open the following screen.
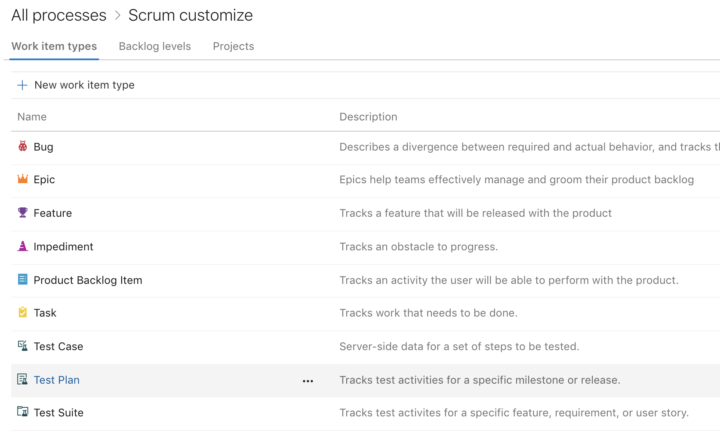
Click “Product Backlog Item” to make a customization for that item type and how board handles it.
Choose “Rules” and “New Rule”.
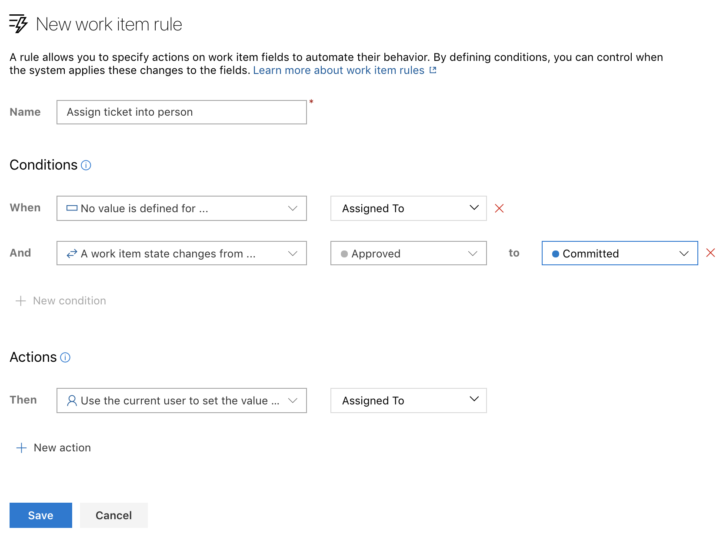
Customization we are doing here is that we want to assign a product backlog item automatically into person once that item is moved into “Committed”
See the following screenshot on how this is done.
First we make sure we don’t overwrite assignee with this rule as we check that “Assigned To” field is empty. Then we check that when the state is changed from “Approved” to “Committed”. As with Scrum this is the normal flow, once item is appoved a developer can start to work on that and then state is “Committed”
once all the previous rules are met we change the “Assigned To” for the person moving the item into “Committed” state.
With this kind of simple changes we make it faster to handle items on boards and take away those annoying things that you need to do manually everytime.
There are lots of other stuff that you can do with boards. But this was just a small look into what is possible and how we have seen this is best used.
If you have any questions about Azure Boards or any cloud related matters please do not hesitate to contact me
toni.kuokkanen@solita.fi
+358 40 1897586
https://www.linkedin.com/in/tonikuokkanen/